How to Elevate Your Bathroom

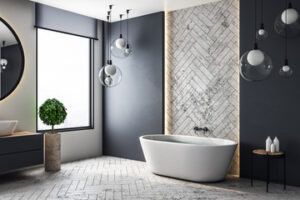
Bathrooms should be a place to rest and refresh. But that doesn’t mean your bathroom can’t have some serious style.

Bathroom Design

Floating shelves can make a big statement in your bathroom. They’re minimally invasive but can be found in many different styles to suit your space’s aesthetic. They’re ideal in corners, nooks, over the toilet, on the back of a door, or any space where wall storage is desired.

Wooden options like reclaimed wood or barn board are great for rustic designs, while white finishes can create a sleek and minimalist look. Add decorative elements like greenery or vintage canisters to bring a unique twist to your floating shelf design. Stacking multiple items like wicker baskets or glass jars on each shelf is another creative way to style your shelving. Try staggering functional items, like Q-tips and cotton swabs in small jars, or even books, on each shelf to create an eye-catching display.

If you’re not a handy DIYer, you can also purchase pre-made wooden shelves. They’re often painted in a coordinating color to your walls, which helps them blend in without creating visual clutter. If you’d prefer a more natural wood look, you can stain the shelves yourself. Before staining, sand the surface of the wood to remove any rough spots. Then use a damp cloth to wipe away any sanding dust. Once the shelf is dry, apply a few coats of wood stain to your shelves. Then let the wood finish cure before using your new bathroom shelving.

Mixing Patterns

Choosing the right mix of patterns in your bathroom is key to a unique design. While a single pattern may seem like too much, incorporating several varying textures and designs can add an element of intrigue. For example, choose rough stone and smooth tile for contrast or play with different shades of the same color. The key is to make sure that the different colors or textures complement each other, not compete with one another.

If you’re not ready to take on a full-scale pattern, opt for a bold floor rug that features your preferred style. This will tie your room together without being too overpowering. Popular patterned bath rugs include herringbone, chevron, imperial trellis and quatrefoil patterns.

When it comes to mixing tiles, it’s important to remember that the size of the pattern will determine how well it pairs with other shapes and sizes. For instance, a small hex tile pattern might pair well with larger oblong tiles for a sense of balance. Similarly, mixing large-scale herringbone and smaller chevron patterns might work in your favor because they share the same dominant pattern.

When it comes to mixing tile patterns, it’s also a good idea to prioritize a color scheme for the entire room before you start. This will help you decide how many different types of patterns and shapes you can use in the space without creating visual clutter. Also, try not to combine multiple finishes, such as glossy and matte tiles. The contrasting materials can create an unbalanced look in your bathroom.

Rustic Wood

Rustic elements can be used in a modern bathroom design to create a look that’s both contemporary and comfortable. Wood is a popular choice for rustic designs and it can be used in almost any area of the room. Try adding a wood vanity, wall paneling, or even a floor made of reclaimed hardwood for a unique and earthy look. Using natural materials like clay in decorative accents is another great way to add a rustic element to your bathroom design.

If you have a more modern style house, integrating rustic elements into your bathroom design can be easier than you might think. You can use reclaimed wood to build a unique vanity or even cover walls in rough-cut lumber for an interesting contrast with smooth tile. Using natural stone for shower stalls and accents can also work well in any bathroom.

If you’re looking to add a bright showpiece to your bathroom, rustic style decor is a perfect choice. Using a bold color in a shower curtain, a decorative tile wall, or a simple piece of furniture can instantly grab attention and give your bathroom a unique, rustic look. A few rustic accents can really brighten up a room without overpowering it. If you don’t want to commit to a complete remodel, you can easily incorporate rustic accents with the addition of new linens and paint. This is a great way to update your bathroom without spending too much money.

Double Sinks

When it comes to bathroom design, double sinks make a lot of sense. Especially for bathrooms that are used by couples, two sinks mean that one person doesn’t have to worry about getting in the other’s way when trying to get ready.

Whether they’re side-by-side or built into a larger piece of furniture, dual vanity basins offer convenience and symmetry in any bathroom space. They can also add a more luxurious feel, which is ideal for master baths or guest bathrooms.

While many people think that a his-and-hers vanity is the only way to incorporate double sinks into their bathroom design, there are plenty of other ways to do it. For example, using an antique dresser or sideboard as a bathroom vanity can be an attractive option. Pairing it with a large mirror that spans the entire wall is an easy way to create a symmetrical layout.

In addition to creating a more convenient space for couples to share, a double sink in your master bath may also increase the resale value of your home. However, it’s important to be mindful of NKBA planning guidelines when designing your bathroom with two sinks to ensure that your home’s plumbing and electrical systems are up to code. In general, it’s best to avoid tucking in dual sinks next to each other because the proximity to each other can lead to overheating and moisture issues.

Texture

As the bathroom becomes a spa-like space for relaxation, textures that enhance tactile richness are on the rise. Natural materials like wood, stone, and even living plants boost visual appeal and create a grounding sanctuary.

A harmonious blend of sleek modernity with rustic charm is a top bathroom remodel trend for 2024. From contemporary vanities that showcase reclaimed wood to rustic light fixtures, this hybrid aesthetic is timeless and captivating. This design approach complements a new direction in bathroom styles that favors a more living room-like aesthetic.

Another interesting development in bathroom trends is a shift toward bold colors that are often reserved for living rooms and bedrooms. Rather than neutrals or pastels, homeowners are turning to bold shades like navy blue. The striking hue has a rejuvenating effect and is a fresh alternative to sage green or gray.

A more subtle way to add texture to the bathroom is by using a delicate raffia wallcovering. The woven material adds depth to the space and is an attractive contrast to a modern white vanity. Also resurfacing is the art deco-inspired Crittall window frame. The sturdy metal-framed structure was first introduced in the 1880s and has become popular again thanks to its versatility in modern bathrooms. It can be used to frame a shower screen or add visual interest above a freestanding tub. It also pairs well with metallic elements, a bathroom trend for 2024 that emphasizes brass and silver accents.

Accessories

Accessories are the finishing touches that can be the difference between a drab washroom and a stunning one. These little ornaments can be functional or purely decorative, but the best ones offer a bit of both. From floral stainless-steel toilet paper holders to painted bath trays, unique bathroom ornaments and accessories are the perfect way to elevate your space and add a touch of personality.

Shelves are one of the most important storage items in a bathroom design, and they can be used to display a variety of other accessories and decorative pieces. They also give the room a clean and spacious look. Another functional accessory is a set of robe hooks, which can be placed close to the shower or bathtub and are great for keeping clothes or hand towels within arm’s reach.

Soap dispensers are an excellent choice for storing liquid soap, and they can be bought in a wide range of materials and finishes. Generally, it is better to buy a matching set of bath accessories, such as a soap dish and toothbrush holder, in order to create a cohesive aesthetic for the space.

Adding the right accessories can transform a boring bathroom into a relaxing oasis that is sure to leave guests impressed. If you are not quite sure what to do with your bathroom, contact a design professional for help. They can suggest a few different options and help you select the perfect accessories for your home.

What Is Fire Restoration?

Fire restoration is the process of cleaning, repairing, and returning properties to their pre-fire condition. It includes assessing damage, cleaning soot and smoke residues, and addressing water damage to prevent further issues like mold growth.

Fire Restoration

Acidic smoke residues can cause the etching of glass and rusting of metal within minutes, while soot can stain anything it touches, including wood, carpeting, rugs, and more. Contact All Pro Services for professional help.

Fire damage can leave behind a lot of materials that are vulnerable to moisture, rust and decay. This can make a home or building look terrible and may lead to health problems for anyone living inside the property. This is why it’s so important to take action and contact a professional to perform fire restoration as soon as possible after the fire.

During the fire damage assessment, the professional will use inspection checklists to note what types of materials were affected and which are still intact. They will also determine what can be cleaned and what must be discarded. They may also recommend that you replace certain items to prevent future damage and to protect your belongings.

The cleaning phase is often the most labor-intensive part of fire restoration. This involves removing all signs of smoke and soot from surfaces, including carpeting. Deodorizers are also used to get rid of any remaining odors that are left over from the fire. If water damage has occurred, sanitizers and antimicrobial agents might be used to prevent mold growth in the future.

Another key thing to note is that it’s extremely dangerous to return to a home or business until the fire department gives the all-clear. If you must enter, it’s a good idea to wear masks to avoid breathing in smoke and soot, which can cause respiratory problems. It’s also a good idea to wear protective gloves when touching anything that has been exposed to the fire.

After the cleaning and assessment phases are complete, it’s time to start repairing the damage that was caused by the fire. If a portion of the roof or walls were damaged by heat, the professional will seal and tarp these areas to prevent further water damage. They will also dry out any materials that were affected by the water and use fans to help speed up this process.

They may also use chemical solvents to remove any residue or stains that remain. This can include rubbing alcohol, paint thinner, vinegar and specially formulated soot removers.

Clean up

After the fire is out, the property must be cleaned. This involves removing debris and soot from the property, cleaning up the structure of the building and repairing or replacing damaged materials. The team will also sanitize the area and apply deodorizers to remove any unpleasant smells. Finally, the team will board up or secure the property to prevent theft or vandalism.

The cleaning process is one of the most labor-intensive parts of fire restoration. It involves scrubbing all surfaces and contents, including furniture, for soot marks and stains. The team will also clean ducts, which may be covered in soot and contaminated with smoke residue and odor. The team will then use deodorizers to completely eliminate any lingering odors from the fire.

It is important to have a professional help with the cleaning and restoration after a fire because it can be extremely dangerous. Soot is acidic and corrosive, and it can damage walls and other surfaces. The longer it is left on a surface, the more damage it will cause. If the area is not properly cleaned and sanitized, the home or business could become susceptible to mold and other harmful bacteria.

If your home or business was damaged by a fire, it is important to contact a fire restoration company right away. They can repair the damages and restore your home or business to its original condition. The professionals can also assist you with the insurance claims to minimize the financial impact of the fire.

Recovering from the effects of a fire can be very stressful and time-consuming. However, it is important to take things one day at a time. Trying to do everything at once can make the recovery process more difficult. Focus on what is most important and try to stay positive. By staying positive, you will be able to move forward and get your life back in order.

Repair or replace

Fire damage can be devastating, and often requires more than just a thorough clean. If the building’s structure has been weakened, or items destroyed in the fire, it may be necessary to replace them. It is also possible that lingering smoke or water damage could affect the ability of a home to function.

A fire restoration company can help you assess the damage to your property and determine what steps are necessary to repair or rebuild. They can also work with your insurance company to help you understand what is covered by your policy. In some cases, they can even act as an advocate to ensure that you receive the compensation you deserve.

The first step of any fire restoration process is to remove any standing water. This is typically done by using high-powered fans, dehumidifiers, and other specialty equipment. This helps prevent secondary damage, such as mold growth, and it also makes it easier to clean the affected area. The next step is to dry out the property. This involves a thorough cleaning and sanitization to remove soot, smoke residue, and odors. This is a delicate process, and it’s important that it’s done correctly to minimize future damage.

Once the area has been thoroughly cleaned, the restoration team will start to repair any damage caused by the fire. This may involve repairing or replacing walls, ceilings, or floors. They will also use special cleaning agents to salvage as much of the furniture, appliances, and other contents as possible. They will also neutralize any odors and dispose of anything that is beyond saving.

It’s also common for this phase of fire restoration to include packing up and storing personal belongings. This can be a difficult process, especially for families with small children. However, it’s essential to protect valuable items from further damage by removing them as soon as possible.

It’s also important to find a fire restoration company that offers 24/7 availability. This will help mitigate the damage to your property as quickly as possible, since soot can be extremely acidic and corrosive. It’s also helpful to choose a fire restoration company that offers a warranty or guarantee on their work. This shows that they believe in the quality of their work and are willing to stand behind it.

Rebuild

Fire restoration involves a lot of work. It can include property board up, demolition and reconstruction, debris removal, cleaning and sanitizing, odor removal and more. In addition to repairing and restoring the contents of your home or business, it also includes rebuilding damaged structural elements like beams, columns and load-bearing walls. Professionals are trained to do this safely and quickly.

The first step in the fire restoration process is an assessment. The technicians enter the property once it’s deemed safe by firefighters and use inspection checklists to note all types of damage. They’ll also determine what can be saved and what needs to be discarded.

After a thorough inspection, they can begin the cleanup process. This will include the removal of smoky, greasy residue from surfaces, including walls, floors and ceilings. Then they’ll clean and deodorize all items that can be saved, including furniture, clothing and appliances. They’ll also clean and deodorize ducts and vents, which can be difficult to reach in a home or business.

In some cases, the restoration team will remove any items that can’t be restored. This is usually done to prevent contaminated items from being accidentally reintroduced into the home or business. In addition, it may be necessary to remove and dispose of electrical machines and appliances, which can still store electricity even after they’ve been unplugged.

The next part of the process is to clean and disinfect everything that can’t be salvaged. This is often the most time-consuming and complicated part of fire restoration, but it’s also one of the most important. Soot, ash and other contaminants can cause long-term damage to your home or business if not cleaned properly. During this phase, the fire restoration experts will go through your entire home or business. They’ll clean and disinfect everything from the attic to the basement, removing any lingering odors or harmful particles.

After the cleanup and repair processes are complete, the restoration professionals will conduct a final inspection of the property to ensure that it meets all industry standards. They’ll also check for lingering issues, such as smoke odors or mold growth, and address them accordingly. Once they’re satisfied that the property is ready, they’ll notify you and your insurance company so you can move back in.

Kitchen Mold

Great Tips For Removing Kitchen Mold

Molds need moisture and food to grow, which is why the kitchen is one of the coziest areas for them to thrive in. The good news is that there are several natural ways to get rid of them without putting your health at risk.

Start by putting some tea tree oil or grapefruit seed extract in a spray bottle. Use this on the area affected by the molds and scrub.

1. Clean the Area with Bleach

The kitchen is one of the most popular places for mold to grow in homes. It offers the ideal conditions for it to thrive, including warm temperatures, plenty of moisture and food sources. Although the fungus requires a professional to remove it, homeowners can tackle the problem by wearing protective gear like goggles, a mask and gloves. They should also moisten the area first to prevent dry mold spores from becoming airborne during cleaning.

If the fungus is only in a small area of your kitchen, home cleaners made from pantry staples may be enough to get rid of it. According to Homes & Gardens, white vinegar has a successful track record for getting rid of mildew on porous surfaces such as grout. Similarly, according to Modernistic, a mixture of bleach and water can be used to scrub away the mold. However, it is best to use a disinfectant and to apply the solution in a well-ventilated area.

Baking soda is another easy-to-use household item that can help in the fight against mold. It helps eliminate odors and absorbs mildew, which is a common source of smelly kitchen stains. Mix a quarter teaspoon of the powder with water to create a solution that you can spray on the surface of your kitchen. After letting the product sit for an hour, you can rinse and then wipe the mold away.

If you have a more serious kitchen mold infestation, consider using natural essential oils to kill it. Tea tree, cinnamon or clove oil can all be effective in removing the spores and preventing them from returning. Add a teaspoon of the substance to a spray bottle and apply it to the affected area, allowing an hour to pass before rinsing.

2. Vinegar

Mold is not only unsightly and smelly, but it can be harmful to your health. It can cause breathing trouble, worsen asthma and trigger allergic reactions. This is why you should always do your best to eliminate it. It may seem like a daunting task to get rid of, but with the right tools and proper cleaning you can do it easily and effectively.

One of the most common household items that can kill mould is vinegar. Vinegar is a natural antifungal and antibacterial agent that can effectively remove mould from surfaces as long as it is allowed to dry. To use, simply pour a generous amount of white vinegar onto the affected area and allow it to sit for about an hour. Once the time has passed, rinse the area with water and wipe clean.

Vinegar is also effective on removing mildew and other stains from surfaces, but it is not as good for killing the spores that cause mould. To remove stubborn stains, mix equal parts of baking soda and white vinegar together to form a paste. Apply the paste to the stain and scrub using a toothbrush or other tool that can reach into corners and other hard-to-reach areas. Once the stains have been removed, rinse with water and allow to dry.

If the vinegar solution fails to completely remove the mould, you may need to call in a professional to find and treat the root of the problem. If the problem is widespread, it could be a sign that there is an underlying moisture issue. If this is the case, it’s a good idea to contact a specialist for water damage restoration or waterproofing.

3. Baking Soda

Baking soda is a natural household cleaner that kills mold and mildew without harsh chemicals or toxic fumes. It can be used on surfaces such as walls, ceilings and carpet. Baking soda is also safe for babies, pets and plants. It is a great non-toxic alternative to bleach and can be found in your kitchen cupboard. It is effective at removing lighter mold stains and can help prevent future outbreaks by absorbing mildew smells.

It can be mixed with water or vinegar to create a homemade mold killer. It is typically sprayed onto the surface of the contaminated area and then scrubbed with a brush or sponge. A baking soda and vinegar solution can kill around 82 percent of mold spores, viruses and bacteria. Vinegar can also be used as a mold preventative by spraying it on surfaces and allowing to dry completely.

White vinegar is one of the best and most affordable home remedies for eliminating mold. It contains acetic acid, which is proven to kill over 80 percent of common household mold species. It can be sprayed directly onto a moldy area and left to dry, or it can be diluted and used as a general disinfectant.

If you’re not comfortable using a chemical-based solution to remove your mold, you can use a homemade baking soda and vinegar solution. Simply add a quarter of a tablespoon of baking soda to a spray bottle and fill the rest with water. Shake the mixture to ensure that the baking soda is dissolved, and then spray it onto the affected surface. Allow the spray to sit for about an hour, and then scrub it with a brush or sponge. After cleaning the surface, rinse it with clean water and let it dry completely.

4. Hydrogen Peroxide

Hydrogen peroxide is a common household item that can help with a variety of cleaning tasks. It is especially useful for removing mold because it can kill the organisms while leaving the surface clean. It also does not pose the same health risks as bleach and can be bought at many grocery stores or pharmacies. Hydrogen peroxide can be used on both porous and non-porous surfaces and works best when it is sprayed on and allowed to sit for up to 10 minutes before being scrubbed and rinsed.

To use hydrogen peroxide to remove mold, place undiluted 3% solution into a spray bottle and apply directly to the affected area. Wait ten minutes and then scrub the mold growth with a brush or sponge. Rinse the surface with a towel and allow to dry completely. Hydrogen peroxide can be used to clean a wide range of surfaces including wood, tile and vinyl. However, it is important to note that it does not work as well on porous surfaces like drywall.

Another great tool for removing mold is baking soda. Baking soda is a natural cleaner that can be used to clean many different types of surfaces. It is safe for kids and pets and is a very effective mold removal agent. To use baking soda to remove mold, simply mix one quarter of a tablespoon of baking soda with a cup of water and put it into a spray bottle. Apply the solution to the moldy areas and wipe away with a clean towel.

Tea tree oil is another natural substance that can be used to remove mold. This essential oil is derived from the leaves of a small plant called Melaleuca Alternifolia and contains an antifungal agent that can kill mold. To use tea tree oil to remove mold, mix a teaspoon of the substance with a cup of water and spray the solution on the affected area.

5. Lemon Juice

The presence of moisture in kitchen areas makes the space a prime area for mildew and mold growth. Fortunately, there are some effective home methods that help get rid of the problem. Some of the most useful include baking soda and hydrogen peroxide. They are non-toxic, affordable, and easy to use. Other options include vinegar, lemon juice, and grapefruit seed extract. The combination of these ingredients provides the most effective solution for cleaning mold in the kitchen. This solution works by acting as a foaming agent to facilitate cleaning and eliminating the moldy smell during and after the process.

Hydrogen peroxide is a natural anti-fungal, and is perfect for fighting mold because of its disinfectant properties. Add a 3% concentration to a spray bottle, and saturate the infected surface. Leave it to soak for a few minutes, and then scrub the surface. If necessary, apply more peroxide and repeat the process. The solution will also work on porous surfaces like wood and fabric.

Another natural remedy is to mix a solution of equal parts baking soda and vinegar to clean the mold. Baking soda will act as a foaming agent to ease the cleaning and eliminate the smell. Vinegar is a strong anti-fungal that kills mold and mildew, and it is very effective at killing the spores. Combine both of these items, and add a little bit of water to make a paste that can be applied with a toothbrush to scrub difficult areas.

The acidic content of lemons makes it an excellent mold killer. This natural, affordable, and environmentally friendly housecleaning option also leaves behind a pleasant citrus scent. It is highly effective on non-porous surfaces, including walls, carpets, fabric/clothing, and bathroom tiles. However, it has limited penetration into porous materials and may require multiple applications and scrubbing to remove stubborn mold.